iRODS Demos: iDrop Web 2
Note: Cloud Browser has superseded all iDrop Web development. Please see this blog post or Github for additional information.
So, you've set up an iCAT server, but your users need a graphical interface to upload and download files and examine metadata. And for a variety of reasons, you don't have the option of installing a client on each user's machine. So how can you make it so your users can access iRODS?
Note: December 4, 2014: I've updated this post with paths to stable locations for the iDrop Web 2 files.
You may have heard that there are web-based iRODS clients. Actually, there are several ways to access iRODS through the web, using interfaces developed and maintained by the DICE Center at UNC. One such interface--and one of the easiest to deploy--is iDrop Web 2, which is a Java-based iRODS client hosted on a Java application web server. In this post, I will walk through setting up iDrop Web 2 on a VM that also hosts an iCAT server. Note that iDrop Web 2 and iRODS can be hosted on separate machines; we use a single server in this demo for the sake of simplicity. If you follow these instructions, you will have a functioning iRODS installation that you can access through a web browser. I'm sure you're eager to get started, so here we go!
Note: This is a quick installation for demonstration purposes. There are myriad customizations that you can make, and you should investigate and plan thoroughly before going to production with your setup.
iDrop Web 2 and iRODS on a VM
Step 1. First, you'll want to set up an iCAT server, as explained in my previous post.
Step 2. Next, you need to install a Java web application server to host iDrop Web. I use Tomcat for this.
iCAT-VM$ sudo apt-get install openjdk-6-jdk tomcat6
Step 3. Download and edit the iDrop Web 2 configuration file.
iCAT-VM$ sudo mkdir /etc/idrop-web
iCAT-VM$ sudo wget -P /etc/idrop-web http://people.renci.org/~danb/FOR_DEMOS/iDrop-Web-2/idrop-web-config2.groovy
Edit /etc/idrop-web-config2.groovy.
Uncomment section 2 to have iDrop Web 2 automatically point to the iRODS server on localhost, and update the zone name and resource name to match your iRODS configuration. Note that I have added a slash on line 21 to close the previous comment and removed a "*/" on line 28, where the comment used to terminate.
/*
 * Configuration for idrop-web - iDROP Cloud browser
 * Project page: https://code.renci.org/gf/project/irodsidrop/
 *
 * Deployment instructions:
 *
 * 1) Set configuration for your deployment server.  Set the name in production below to the URL you want to use.  This value is used by Grails to
 * compute links, so it should be the front end for your application (e.g. if you run Apache HTTP server in front of Tomcat with SSL, this would be
 * the end-users 'https://' URL
 *
 */
environments {

     production {  grails.serverURL = "http://localhost:8080/idrop-web2" }

}

/*
 * 2) If you want to set things up so that the idrop web browser automatically points to a certain grid (i.e. only user ID and password show, then do something like below.
 * Take the following outside of the comment block and configure here
 */
 idrop.config.preset.host="localhost"
 idrop.config.preset.port="1247"
 idrop.config.preset.zone="tempZone"
 idrop.config.preset.resource="demoResc"
 // can be Standard or PAM right now
 idrop.config.preset.authScheme="Standard"


//idrop.config.idrop.jnlp="http://iren-web.renci.org:8080/idrop/idrop.jnlp"
//drop.config.idrop.jnlp="http://iren-web.renci.org/idrop-snapshot/idrop.jnlp"
idrop.config.idrop.jnlp="http://iren-web.renci.org/idrop-snapshot/idrop.jnlp"
/*
 * 3) Customization properties
 */

// do I support tickets? This determies whether the ticket feature is available via the interface, it also requires ticket support in iRODS itself (version 3.1+)
idrop.config.use.tickets=true

// do I want to display the profile tab and maintain user profile info
idrop.config.use.userprofile=true

// do I support sharing? Requires target server to have specific query support and sharing queries loaded from jargon-user-tagging
idrop.config.use.sharing=true

// do I want to show the gallery view?
idrop.config.use.gallery.view=false

// do I want to show the browse view?
idrop.config.use.browse.view=false
Step 4. Download the iDrop Web 2 WAR file. This is the entire iDrop Web 2 package, which Tomcat will expand automatically after it downloads.
iCAT-VM$ sudo wget -P /var/lib/tomcat6/webapps http://people.renci.org/~danb/FOR_DEMOS/iDrop-Web-2/idrop-web2.war
Let's see if it works. Open a browser on the VM, and point it to http://localhost:8080/idrop-web2.
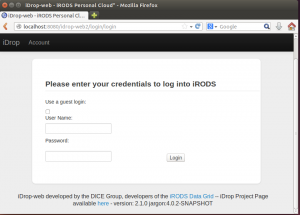
As a test case, you can log in as the iRODS administrator (the default username is "rods"). You'll probably want to add additional users using the iCommand iadmin mkuser.
That's it! Now you have an iDrop Web 2 server. There are numerous ways you may want to reconfigure it. For example:
- Enabling access from outside the VM: You'll need to set up your VM's network interface to access port 8080 on the machine. You may also need to open port 8080 on the firewall on the VM (e.g., using iptables). And you will need to update section 1 of /etc/idrop-web/idrop-web-config2.groovy to point to the hostname or IP address of the VM, rather than localhost.
- Enabling SSL to encrypt the connection between the web browser and iDrop Web: You will need to install certificates and update the Tomcat configuration. And you will need to update section 1 of /etc/idrop-web/idrop-web-config2.groovy to use https instead of http.
Happy iRODS surfing!
Dan Bedard