iRODS in the Cloud: New EC2 Image Available
I finally had a few minutes this weekend to set up an Amazon Machine Image (AMI) for iRODS 4.0.3. In this post, I'll explain how to get started with it...
Note: December 25, 2014: I've updated this post with a new AMI id. The most recent AMI is "ami-7ab7d912".
A while back, I was talking with the team at Metadata Technology, and they suggested creating an AMI with iRODS set up and ready to run. Well, it's here! This is a natural fit with my previous posts on setting up iRODS on a VirtualBox VM and in a Docker image.
Note: For now, the AMI is only available as a shared image in US Region East. We are working to set up the image for the AWS Marketplace and will link to an updated post as soon as it's available.
Once you follow the instructions below, you will have a convenient sandbox with iRODS and iDrop Web 2 for experimentation and expansion, for example, by connecting the AMI to resource servers (e.g., S3, unixfilesystem) or federating with other iRODS zones.
If you're interested in how the image was set up, and/or if you want to make improvements, see my github irods-aws repo.
If you get a chance to check this out, let us know what you think on iRODS-Chat, comment on this post, or contact us directly.
Before you get started, you will need to:
- Create an Amazon Web Services (AWS) account. Note: I have been able to use this image on the AWS "free usage tier."
- Create and download a private key in the AWS US East Region (link).
Now, follow these steps to get up and running.
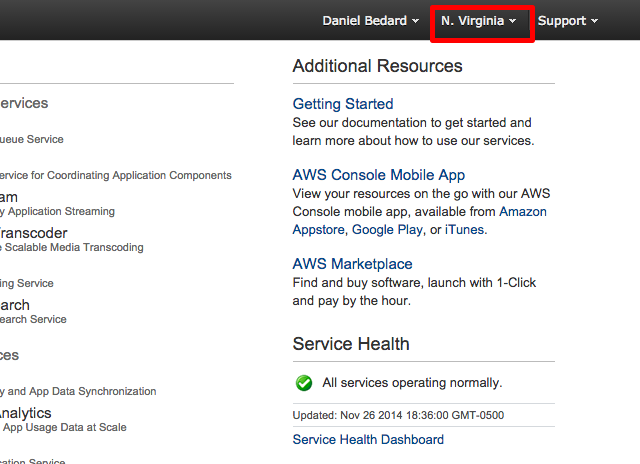
Step 1: Log in at aws.amazon.com. Step 2: Set your region to "US East" or "N. Virginia".
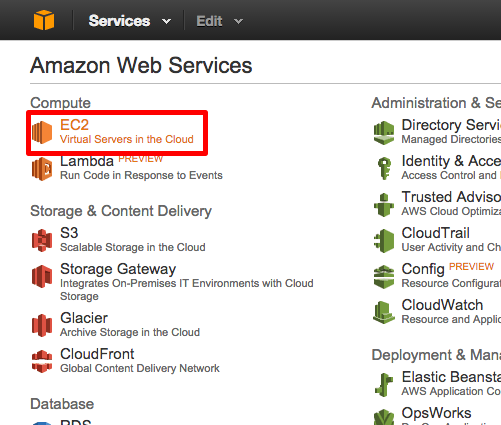
Step 3: Click "EC2".
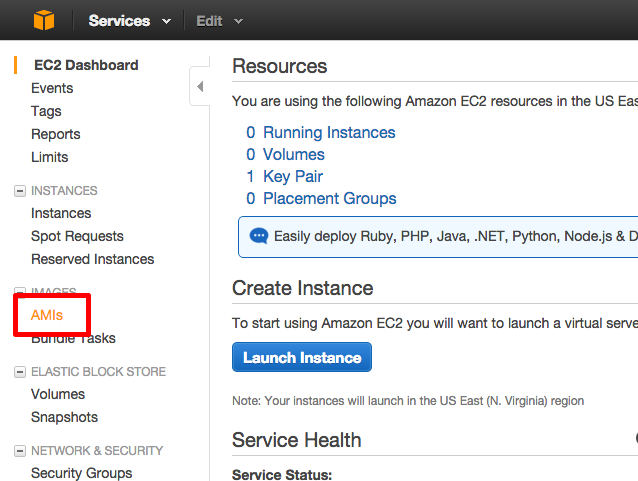
Step 4: Click "AMIs".
Step 5: Select "Public images" from the dropdown selector.
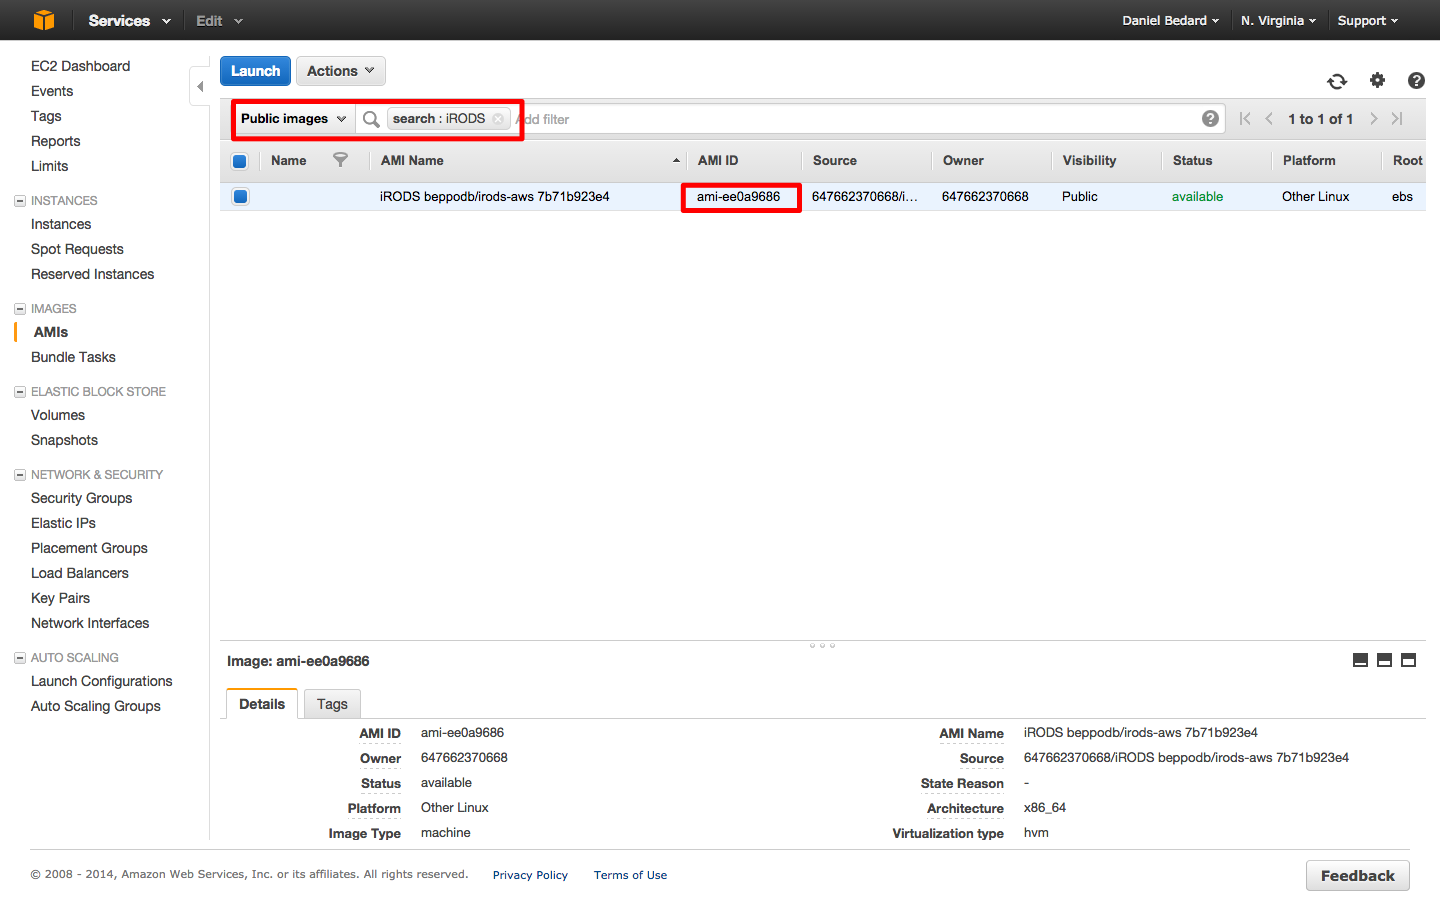
Step 6: Search for the beppodb/irods-aws AMI. The most recent version is AMI ID ~~ami-ee0a9686~~ ami-7ab7d912.
Step 7: Click the entry for the machine image. Click "Launch".
Step 8: Choose an instance type: I have been able to use this AMI successfully on a "t2.micro" instance type, which is eligible for Amazon's free tier. You may find your performance improves with a more advanced VM type.
Step 9: Continue to configure the instance. For "configure instance details," "add storage," and "tag instance," I have not modified any of the defaults.
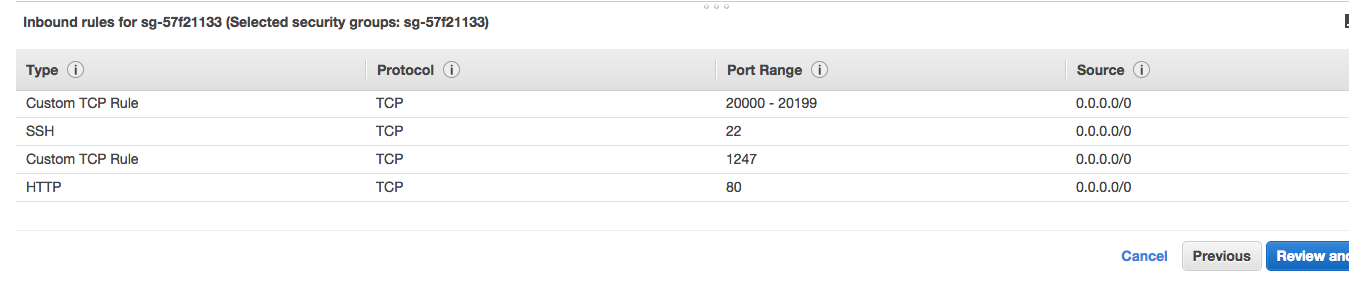
Step 10: Configure security group. Open ports 22 (SSH), 80 (HTTP), 1247 for iRODS control, and 20000-20199 for iRODS parallel file transfers.
Step 11: Review, associate key pairs, and launch!
Step 12: Click "Instance".
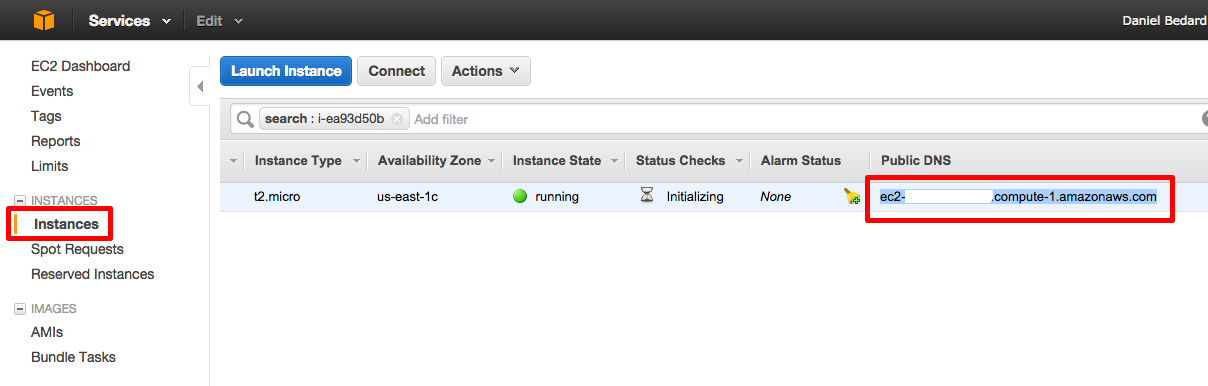
Step 13: Wait a few minutes, then check for a hostname.
Step 14: Log in to your new instance using SSH.
ssh -i <privatekey.pem> ubuntu@<instance hostname>
Step 15: Change the iRODS administrator (rods) password. The existing password has been randomly generated.
sudo su - irods
iadmin moduser rods password <newpassword>
Step 16: Play around. Type the instance hostname into your browser to log in using iDrop Web 2. Use iadmin to add users, add storage resources, and federate with other zones.
Let me know how it goes!
Dan Bedard