How-To: Drag and Drop Access to iRODS with WebDAV
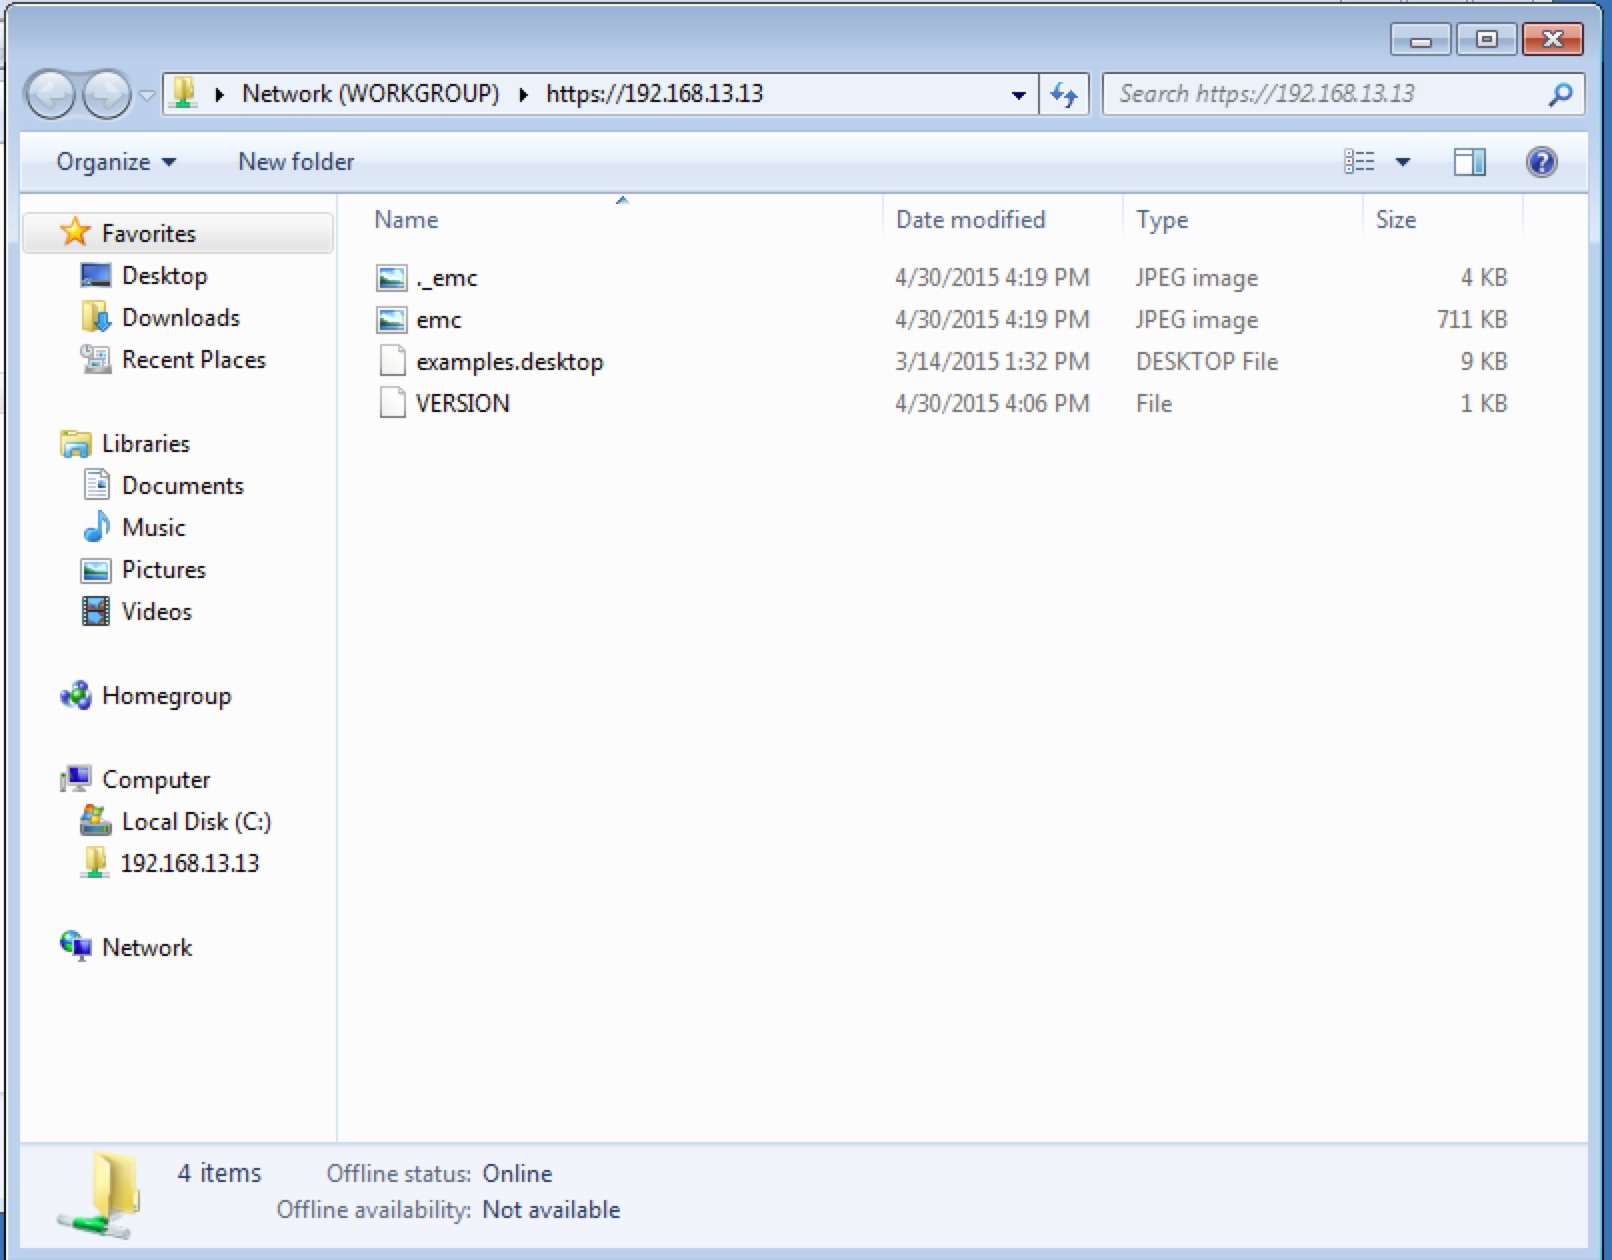
You can now drag and drop files into and out of iRODS collections without installing a separate client (for most OSes), using a WebDAV connector developed by Mike Conway from the UNC DICE Center. The connector is based on the milton.io Java WebDAV server library.
In this post, I will ~~walk~~ run you through an example installation on the Ubuntu virtual machine we configured in this blog post. We're interested to hear about your experiences with it. Please post comments below.
Note: You will need a milton.io enterprise license in order to use Mac OS's Finder to access collections via this connector. We are discussing additional licensing options with the milton.io developer. In the meantime, you may go to http://milton.io/about/license/index.html to request a trial enterprise license.
Note: By default, Windows requires user authentication through this connector to be encrypted. That means you either have to install SSL certificates on the server side, or you have to modify the registry on each Windows client. I cover an SSL install below. If you use self-signed certs, like I do for demonstration purposes, you'll have to tell the Windows client to trust the certs. I point to a link about this in the Windows client configuration section below. Obviously, for a production system, use certificates signed through a legitimate certification chain.
Set up iRODS
- Set up an iCAT server, as in this blog post: http://irods.org/post/icat-on-a-vm/
Add a Network Interface to Your VM
- Shut down the VM. On the VirtualBox menu bar, select "Machine" and then "ACPI Shutdown". Then select the shutdown button in the far right of the menu Ubuntu presents.
- In VirtualBox, click the name of your iCAT VM in order to select it.
- In VirtualBox, click the "Settings" button.
- Click "Network".
- Click "Adapter 2".
- Click the "Enable Network Adapter" checkbox.
-
Pull down the selection box next to "Attached to:" and select "Host-only Adapter".
8. Click "OK" 9. In VirtualBox, click the "Start" button. 10. Open a terminal and use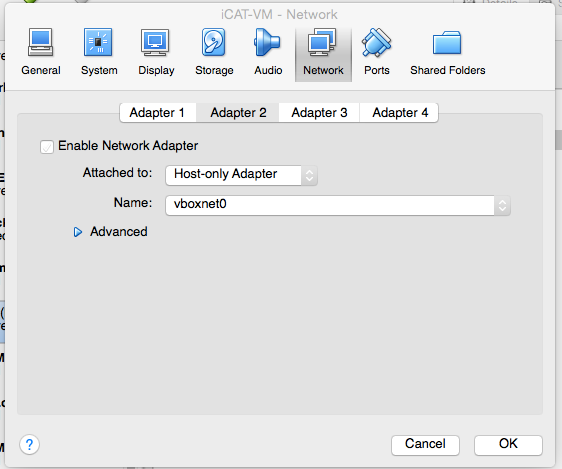
ifconfigto get the IP address of eth1. Take note of this IP address. You will need it later.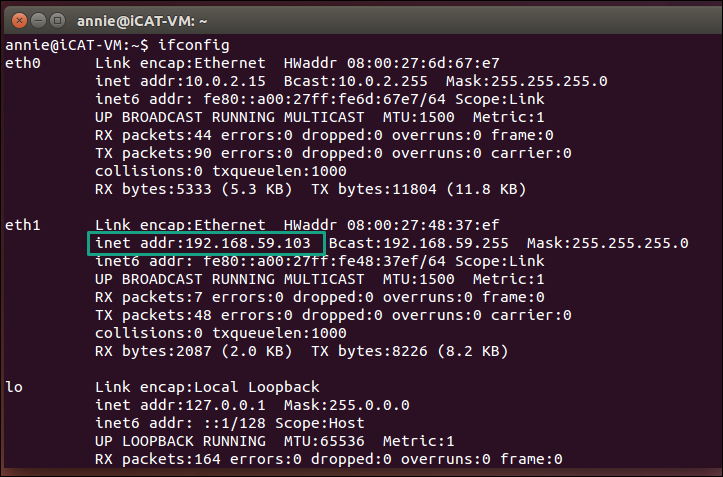
Install and Configure Tomcat, Proxied by Apache, with SSL
-
Install Tomcat.
~~~~ sudo apt-get install openjdk-7-jdk sudo update-java-alternatives -s java-1.7.0-openjdk-amd64 sudo apt-get install tomcat7 ~~~~
-
Install Apache2.
~~~~ sudo apt-get install apache2 ~~~~
-
Edit
/etc/tomcat7/server.xml:
a. Comment out the port 8080 and 8443 connectors
b. Uncomment the port 8009 AJP connector - Enable a couple apache modules:
a. sudo a2enmod proxy_ajp
b. sudo a2enmod ssl
c. sudo a2enmod headers -
Create or acquire a certificate.
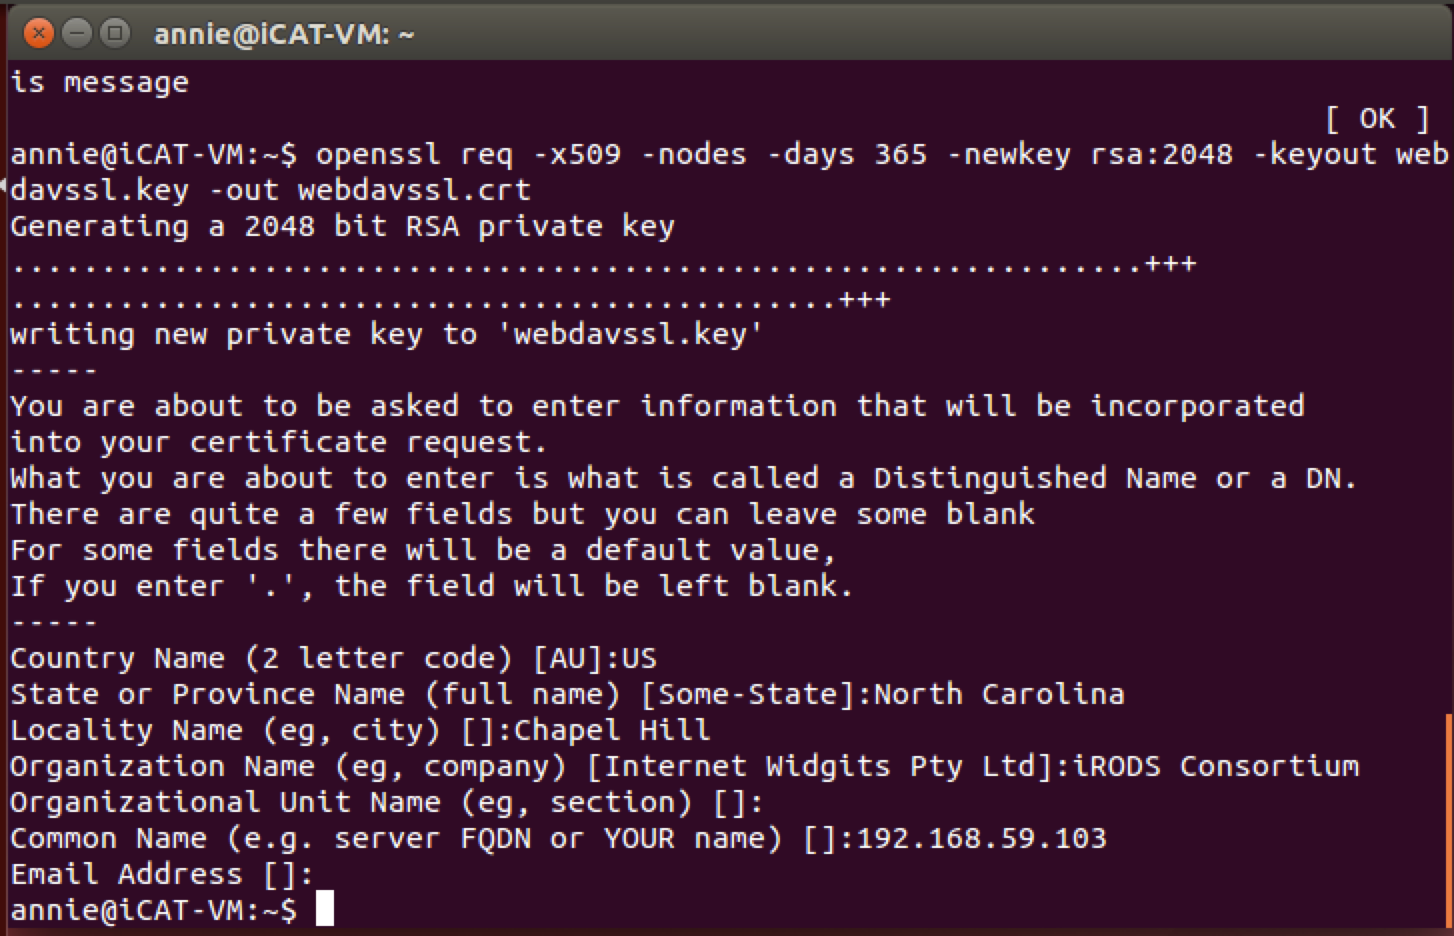
To create your own, install openssl and copy the certificates/etc/ssl/certs.~~~~ sudo apt-get install openssl openssl req -x509 -nodes -days 365 -newkey rsa:2048 -keyout webdavssl.key -out webdavssl.crt ~~~~
Fill in the appropriate information for your certificate.
~~~~ sudo mv webdavssl.key /etc/ssl/certs sudo mv webdavssl.crt /etc/ssl/certs ~~~~
-
Create
/etc/apache2/sites-available/ajp_ssl.confand add the following content:~~~~
# Change uppercase as sent by OS X Finder WebDAV to lowercase as recognized by mod_proxy RequestHeader edit Transfer-Encoding Chunked chunked early # Stream chunked data as-it-is to reverse proxied backend SetEnv proxy-sendchunks 1SSLEngine on SSLCertificateFile /etc/ssl/certs/webdavssl.crt SSLCertificateKeyFile /etc/ssl/certs/webdavssl.key
Order deny,allow Allow from all ProxyRequests Off ProxyPass / ajp://localhost:8009/ ProxyPassReverse / ajp://localhost:8009/ ~~~~
-
Enable the new site:
sudo a2ensite ajp_ssl - Restart apache2:
sudo service apache2 restart - Open port 443 in your firewall, if enabled.
Build and Install the Milton iRODS WebDAV connector
-
Clone the irods-webdav github repo.
sudo apt-get install git git clone https://github.com/DICE-UNC/irods-webdav - Update `irods-webdav/src/main/resources/miltonContext.xml` a: Set host, zone, port, authScheme, and defaultStorageResource. b: Change a resource.factory constructor-arg from "/test1/home/test1" to a collection on your server, e.g., "/tempZone/home/rods" c: Change property context-path from "irods-webdav" to "" ***Note: skip the next step if you are not using the licensed version of milton.io*** d: Change class="io.milton.config.HttpManagerBuilder" to class="io.milton.ent.config.HttpManagerBuilderEnt"
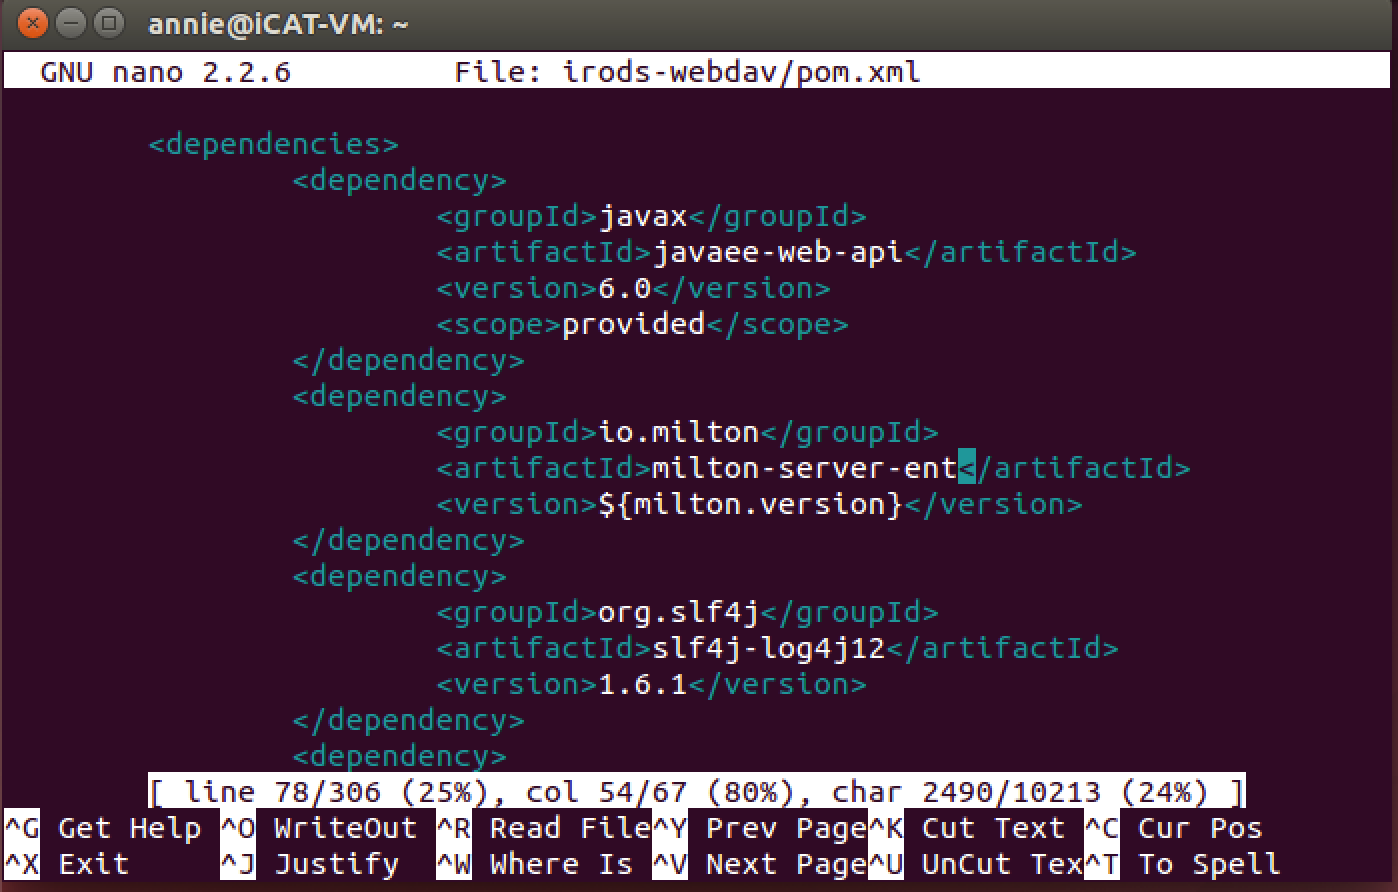
- Update `irods-webdav/pom.xml` a: Change "milton-server-ce" to "milton-server-ent"
- Put the two license files that were emailed to you--`milton.license.properties` and `milton.license.sig`--in `irods-webdav/src/main/resources`. One way to do this is with scp. On the VM:
-
Use Maven to build the connector.
sudo apt-get install maven2 cd irods-webdav mvn package -DskipTests -
Move `irods-webdav/target/irods-webdav-0.0.1-SNAPSHOT.war` to a Tomcat
webapps directory (I usually also change the name to `ROOT.war`.
Otherwise, you will have to navigate to
http://hostname.example.com/\
to access your collection). ### Configure the Client For Mac OSX: 1. Open a Finder window. 2. Click "Go" on the menu bar, then "Connect to Server..." 3. Enter "https://" followed by the IP address of your virtual machine. 4. If you're using self-signed certificates, you will need to acknowledge a warning. 5. Enter your irods user name and password, and click Connect. You should now have access to your iRODS collections via WebDAV.sudo rm -rf /var/lib/tomcat7/webapps/ROOT* sudo mv ~/irods-webdav/target/irods-webdav-0.0.1-SNAPSHOT.war /var/lib/tomcat7/webapps/ROOT.war sudo service tomcat7 restartFor Windows: 1. If you're using self-signed certificates, you'll have to tell the Windows client to trust the certs (This site explains how, but you'll have to "run as Administrator" Internet Explorer: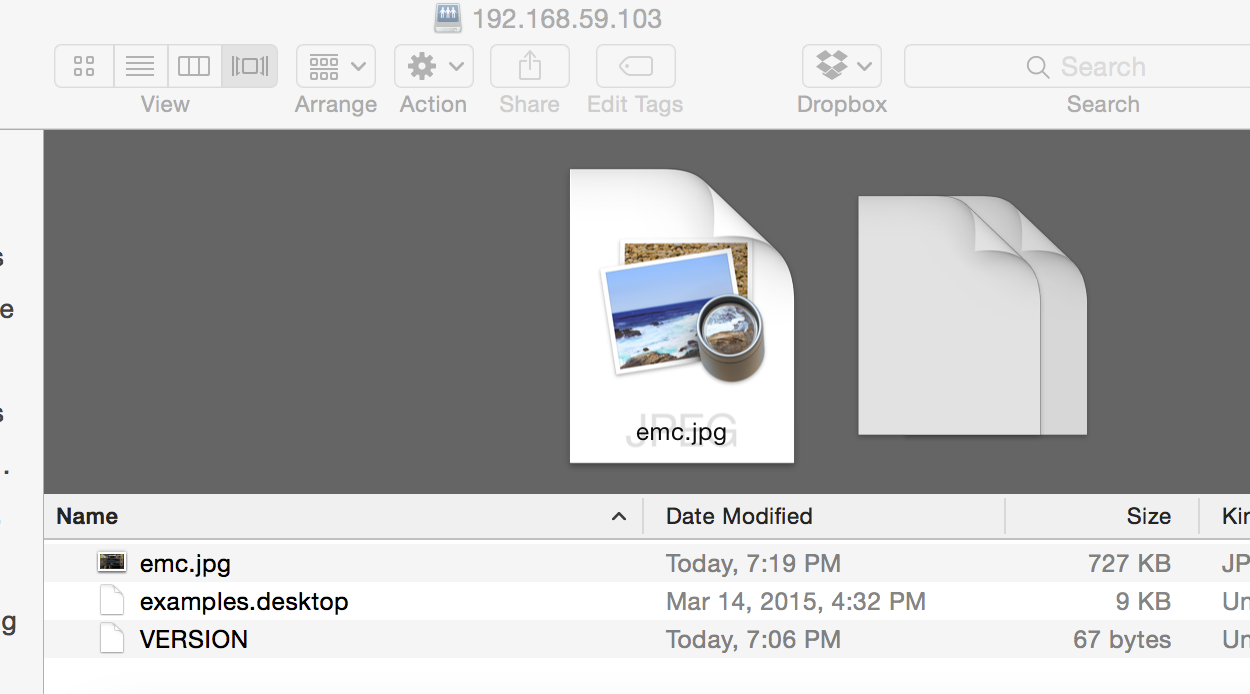
Dan Bedard
<?xml version="1.0" encoding="UTF-8"?>
<beans xmlns="http://www.springframework.org/schema/beans"
    xmlns:xsi="http://www.w3.org/2001/XMLSchema-instance"
    xsi:schemaLocation="http://www.springframework.org/schema/beans http://www.springframework.org/schema/beans/spring-beans-3.0.xsd">


    <!-- <bean id="resource.factory" class="io.milton.http.annotated.AnnotationResourceFactory">
        <property name="controllers"> <list> <bean class="com.bandstand.web.BandsController"
        /> </list> </property> </bean> -->

    <bean id="irodsFileContentService"
        class="org.irods.jargon.webdav.resource.IrodsFileContentService">
        <property name="irodsAccessObjectFactory" ref="irodsAccessObjectFactory" />
    </bean>

    <bean id="webDavConfig" class="org.irods.jargon.webdav.config.WebDavConfig">
        <property name="host" value="localhost" />
        <property name="zone" value="tempZone" />
        <property name="port" value="1247" />
        <property name="authScheme" value="STANDARD" />
        <property name="defaultStorageResource" value="demoResc" />
    </bean>

    <bean id="irodsSecurityManager" class="org.irods.jargon.webdav.resource.IrodsSecurityManager">
        <property name="irodsAccessObjectFactory" ref="irodsAccessObjectFactory" />
        <property name="webDavConfig" ref="webDavConfig" />
        <property name="irodsAuthService" ref="irodsAuthService" />
    </bean>

    <bean id="irodsAuthService" class="org.irods.jargon.webdav.authfilter.IrodsAuthService">
        <property name="irodsAccessObjectFactory" ref="irodsAccessObjectFactory" />
        <property name="webDavConfig" ref="webDavConfig" />
    </bean>

    <bean id="lockManager" class="org.irods.jargon.webdav.resource.IrodsMemoryLockManager"></bean>

    <bean id="resource.factory"
        class="org.irods.jargon.webdav.resource.IrodsFileSystemResourceFactory">
        <constructor-arg value="/tempZone/home/rods" />
        <constructor-arg type="io.milton.http.SecurityManager"
            ref="irodsSecurityManager" />
        <property name="irodsAccessObjectFactory" ref="irodsAccessObjectFactory" />
        <property name="webDavConfig" ref="webDavConfig" />
        <property name="contextPath" value="" />
        <property name="contentService" ref="irodsFileContentService" />
        <property name="lockManager" ref="lockManager" />
    </bean>

    <bean id="milton.http.manager" class="io.milton.ent.config.HttpManagerBuilderEnt">
        <property name="mainResourceFactory" ref="resource.factory" />
        <property name="enableCompression" value="false" />
        <property name="buffering" value="never" />
        <property name="enableCookieAuth" value="false" />
    </bean>

    <bean id="irodsConnectionManager"
        class="org.irods.jargon.core.connection.IRODSSimpleProtocolManager"
        factory-method="instance" init-method="initialize" destroy-method="destroy" />

    <bean id="irodsSession" class="org.irods.jargon.core.connection.IRODSSession"
        factory-method="instance">
        <constructor-arg
            type="org.irods.jargon.core.connection.IRODSProtocolManager" ref="irodsConnectionManager" />
    </bean>

    <bean id="irodsAccessObjectFactory" class="org.irods.jargon.core.pub.IRODSAccessObjectFactoryImpl">
        <constructor-arg ref="irodsSession" />
    </bean>

    <bean id="basicAuthFilter" class="org.irods.jargon.webdav.authfilter.BasicAuthFilter">
        <property name="irodsAccessObjectFactory" ref="irodsAccessObjectFactory" />
        <property name="webDavConfig" ref="webDavConfig" />
        <property name="irodsAuthService" ref="irodsAuthService" />
    </bean>


</beans>
***Note: skip the next step if you are not using the licensed version of milton.io***
sudo apt-get install openssh-server
sudo ufw allow 22
scp milton.license.* annie@192.168.59.103:/home/annie/irods-webdav/src/main/resources